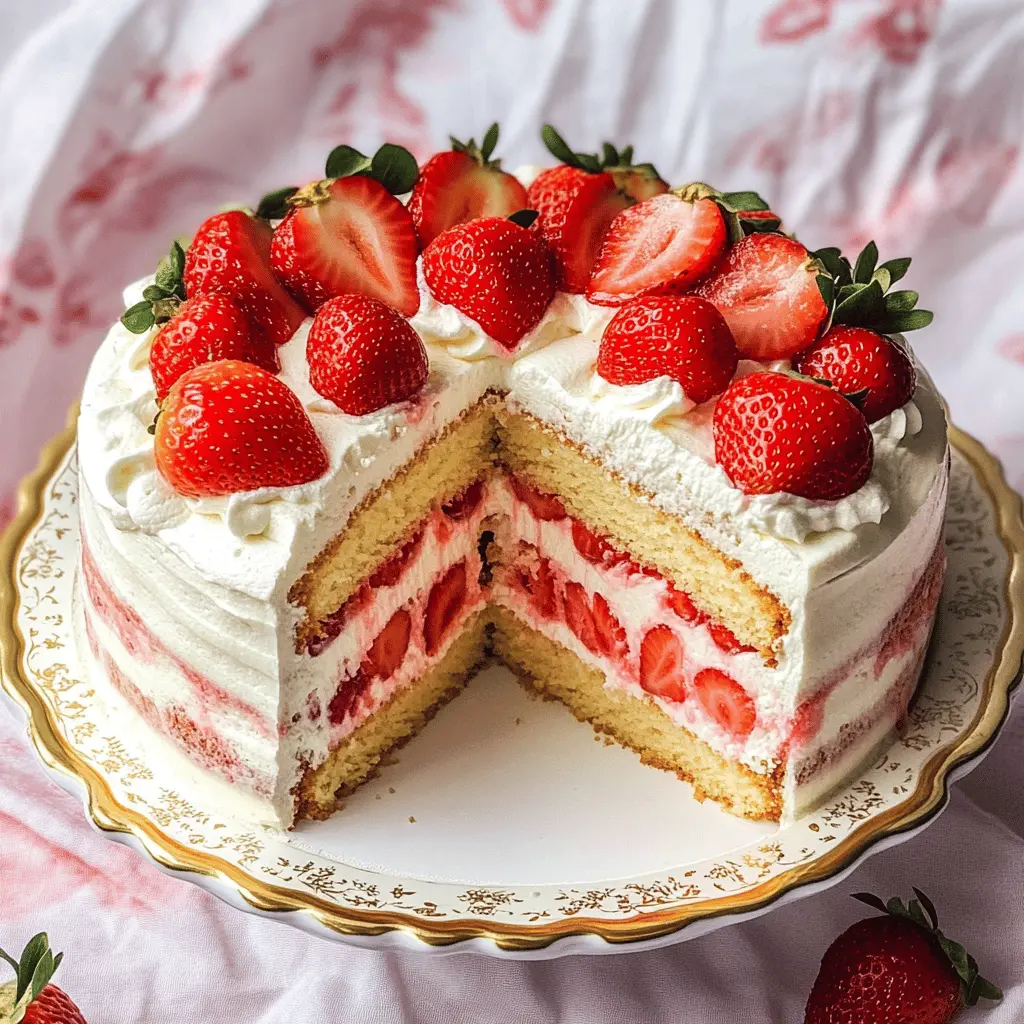
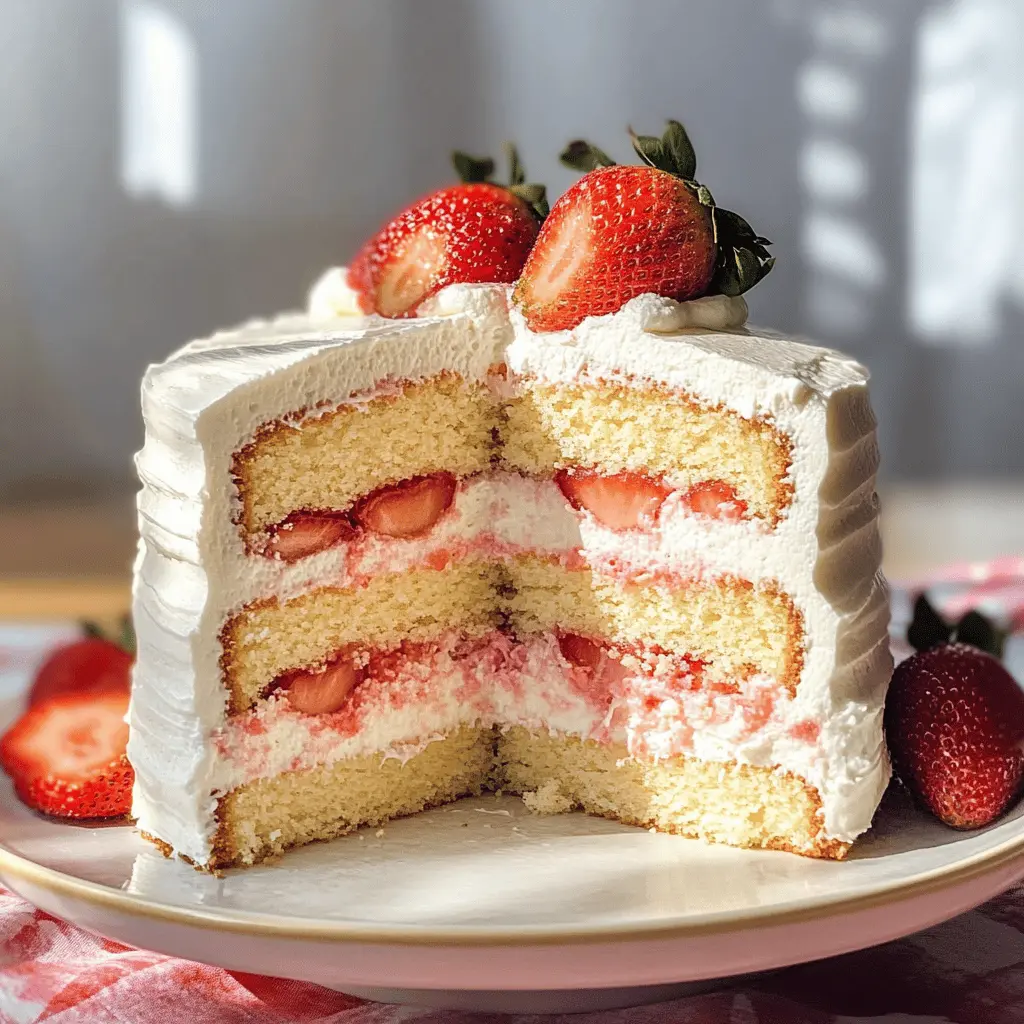
This Strawberry Shortcake Layer Sponge Cake is a light and fluffy delight! With layers of soft sponge cake and sweet strawberries, it’s perfect for any occasion.
Each bite feels like a celebration, and who can resist the sweet, juicy strawberries on top? I love to serve it with whipped cream—it’s like adding a cherry on top, but better! 🍓
Key Ingredients & Substitutions
All-Purpose Flour: This is the foundation of your sponge cake. If you’re gluten-free, you can use a gluten-free blend instead, keeping the texture light.
Granulated Sugar: This adds sweetness and helps with cake structure. You can substitute with a sugar alternative like coconut sugar or for a lower-calorie option, consider using stevia or monk fruit sweetener.
Unsalted Butter: Use softened unsalted butter for the best flavor. If you want a dairy-free version, coconut oil or a vegan butter substitute works great.
Heavy Whipping Cream: Key for that fluffy whipped topping. If you’re looking for a lighter option, you can use a lower-fat whipping cream or a whipped topping made from coconut cream.
What’s the Best Way to Make a Light and Fluffy Sponge Cake?
The secret to a light sponge cake lies in the creaming method. Start by creaming the butter and sugar until light and fluffy. This incorporates air, making your cake rise nicely.
- Use room temperature butter, it creams more easily.
- Add eggs one at a time, beating well after each addition to trap even more air.
- When combining dry ingredients, do it gradually and mix just until combined, over-mixing can weigh the batter down.
How Do You Prepare Strawberries for the Filling?
Making the filling involves more than just slicing strawberries! You want to enhance their flavor. Sprinkle sugar over the sliced strawberries and let them sit for about 20 minutes; this draws out their juices and creates a sweet syrup.
- Adjust the sugar according to the ripeness of your strawberries.
- Mix gently to avoid mashing the strawberries, keeping some slices intact for a nice filling texture.
How to Make Strawberry Shortcake Layer Sponge Cake
Ingredients You’ll Need:
For the Sponge Cake:
- 2 cups all-purpose flour
- 1 ½ cups granulated sugar
- ½ cup unsalted butter, softened
- 1 cup milk
- 3 large eggs
- 2 ½ tsp baking powder
- 1 tsp vanilla extract
- ½ tsp salt
For the Strawberry Filling:
- 2 cups fresh strawberries, hulled and sliced
- ¼ cup granulated sugar (adjust to taste)
For the Whipped Cream Frosting:
- 2 cups heavy whipping cream
- ½ cup powdered sugar
- 1 tsp vanilla extract
For Decoration:
- Additional fresh strawberries, halved (for topping)
How Much Time Will You Need?
This delightful cake requires about 30 minutes for prep and 25-30 minutes for baking. After that, give your cake some time to chill for about 30 minutes before serving. Overall, you should plan for around 1.5 hours before you can enjoy your scrumptious Strawberry Shortcake Layer Sponge Cake!
Step-by-Step Instructions:
1. Preheat the Oven:
Start by preheating your oven to 350°F (175°C). While that’s warming up, take two 9-inch round cake pans and grease and flour them to prevent the cakes from sticking.
2. Make the Sponge Cake:
In a large mixing bowl, cream together the softened butter and granulated sugar with a mixer until it becomes light and fluffy. This step is key for a lovely sponge! Next, add the eggs one by one, making sure to mix well after each addition. Stir in the vanilla extract for flavor.
3. Combine Dry Ingredients:
In another bowl, whisk together the all-purpose flour, baking powder, and salt. Gradually mix these dry ingredients into the butter mixture while alternating with the milk. Mix until everything is just combined—be careful not to over-mix!
4. Bake the Cakes:
Now, pour the batter evenly into your prepared cake pans. Place them in the preheated oven and bake for about 25-30 minutes. They’re done when a toothpick inserted into the center comes out clean. Let the cakes cool in the pans for 10 minutes, then carefully transfer them to wire racks to cool completely.
5. Prepare the Strawberry Filling:
While your cakes are cooling, combine the sliced strawberries with granulated sugar in a bowl. Allow them to sit for about 15-20 minutes so they can release their juicy goodness!
6. Make Whipped Cream Frosting:
In a large mixing bowl, beat the heavy whipping cream, powdered sugar, and vanilla extract together on high speed until stiff peaks form. This whipped cream will be your delicious frosting!
7. Assemble the Cake:
Once the cakes are fully cooled, place one layer on a serving plate. Spread a generous amount of whipped cream frosting on top, and add a layer of the strawberry filling, juices included. Then, carefully place the second cake layer on top.
8. Frost and Decorate:
Spread the remaining whipped cream frosting over the top and sides of the entire cake. To finish it off, garnish with the halved strawberries on top for a beautiful presentation.
9. Chill and Serve:
Chill your assembled cake in the refrigerator for about 30 minutes to let all the flavors meld together. After that, it’s ready to slice and serve. Enjoy your homemade Strawberry Shortcake Layer Sponge Cake!
Can I Use Frozen Strawberries for the Filling?
Yes, you can use frozen strawberries! Just be sure to thaw them completely and drain any excess liquid before using. You may need to adjust the sugar since frozen strawberries can be sweeter or more tart than fresh ones.
Can I Make the Sponge Cake Ahead of Time?
Absolutely! You can bake the sponge cake a day in advance. Once cooled, wrap each cake layer tightly in plastic wrap and store them in the refrigerator. Just be sure to let them come to room temperature before assembling the cake.
How to Store Leftover Cake?
To store any leftover cake, cover it with plastic wrap or place it in an airtight container in the refrigerator. It will stay fresh for up to 3 days. If you want to keep it longer, consider freezing individual slices wrapped tightly in plastic wrap and foil for up to 2 months.
Can I Substitute Heavy Cream for the Frosting?
If you’re looking for a lighter option, you can use a whipped topping instead of heavy cream. However, for the best flavor and texture, heavy whipping cream is recommended as it whips up nicely and holds its shape well!