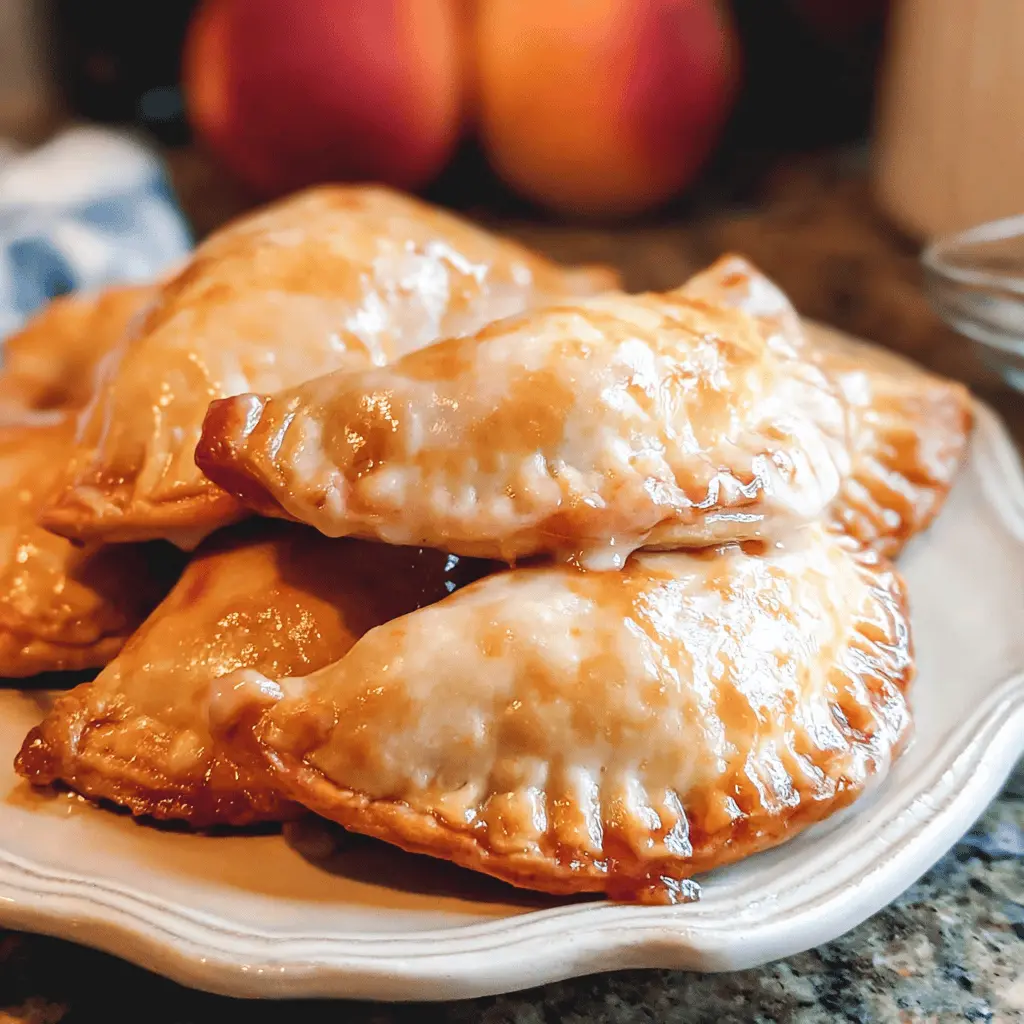
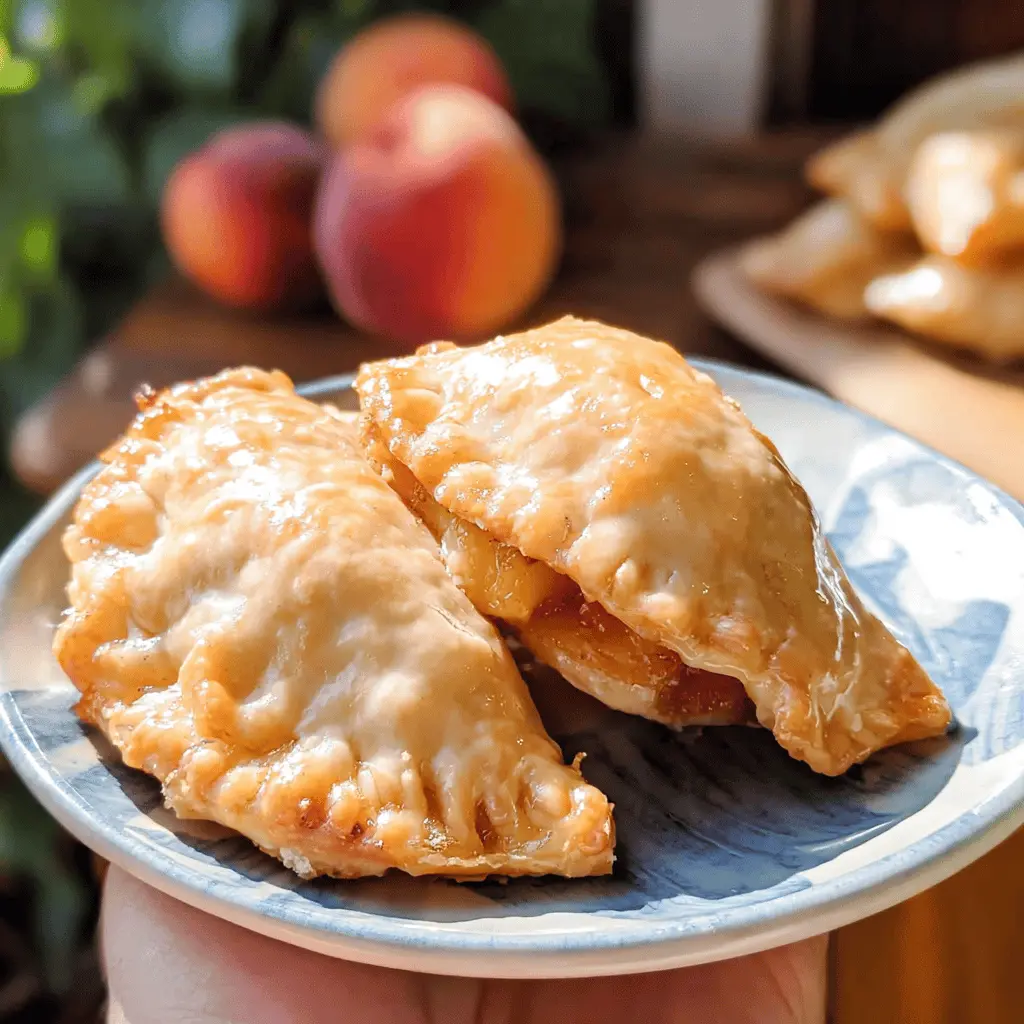
These Easy Peach Hand Pies are like a little bit of summer in your hand! They’re sweet, flaky, and filled with juicy peaches that are perfect for warm days.
Making these pies is a breeze. I love grabbing one for a snack or dessert. Plus, they’re great to share at picnics! Who can say no to that? 😄
Key Ingredients & Substitutions
Peaches: Fresh, ripe peaches are key for the best flavor. If you can’t find fresh ones, canned or frozen peaches work too! Just be sure to drain and thaw them, and adjust sugar as needed since they’re often sweeter.
Granulated Sugar: You can substitute with brown sugar for a richer flavor. If you want to reduce sugar, try honey or maple syrup, but adjust the consistency since those are liquid sweeteners.
Puff Pastry: Store-bought puff pastry is ideal for ease. You could also use pie crust if you’d like a sturdier pie, or even a gluten-free pastry for a gluten-free option!
Cornstarch: This helps thicken the peach filling. If you don’t have cornstarch, you can use all-purpose flour, but add a little more since flour isn’t as powerful as cornstarch.
How Do I Make Sure My Hand Pies Are Perfectly Sealed?
Sealing the edges of your hand pies is important to keep the filling from leaking out. Here’s how to do it right:
- After placing the filling, brush a little beaten egg on the edges of the pastry squares. This acts like glue.
- Fold the pastry over the filling to form a triangle. Use your fingers to gently pinch the edges together first.
- Finally, press the edges using a fork to ensure a tight seal and create a decorative border!
Perfectly sealed hand pies not only look good, but they also keep the delicious filling inside where it belongs! Enjoy making these delicious treats! 😊
Easy Peach Hand Pies
Ingredients You’ll Need:
- 2 cups fresh peaches, peeled and finely chopped
- 1/4 cup granulated sugar
- 1 tablespoon cornstarch
- 1/2 teaspoon ground cinnamon
- 1 teaspoon lemon juice
- 1 package (2 sheets) frozen puff pastry, thawed
- 1 egg, beaten (for egg wash)
- 1/2 cup powdered sugar
- 1 tablespoon milk or heavy cream
- 1/4 teaspoon vanilla extract
How Much Time Will You Need?
This recipe takes about 15 minutes to prepare and 20-25 minutes to bake, making it a quick and enjoyable project. Don’t forget to let the pies cool for a few minutes before drizzling the glaze on top!
Step-by-Step Instructions:
1. Preheat and Prepare Baking Sheet:
First, preheat your oven to 375°F (190°C). While the oven warms up, line a baking sheet with parchment paper so the pies won’t stick while baking.
2. Make the Peach Filling:
In a medium bowl, stir together the chopped peaches, granulated sugar, cornstarch, ground cinnamon, and lemon juice. Mix well so that all the peaches are coated with the sugar and spices. Set this delicious mixture aside for a moment—your filling is ready!
3. Prepare the Puff Pastry:
On a lightly floured surface, roll out each thawed puff pastry sheet. Cut each sheet into 4 equal squares, which will give you a total of 8 squares. These will be the bases for your hand pies!
4. Assemble Your Hand Pies:
Take about 2 tablespoons of the peach filling and spoon it right into the center of each pastry square. Be sure to leave a bit of space along the edges so you can seal them properly. Next, brush the edges of the squares with the beaten egg—this will help the pies stick together when folded.
5. Seal the Pies:
Carefully fold each pastry square over the filling to create a triangle. Press the edges firmly to seal and then use a fork to crimp the edges, giving it a cute pattern and extra security. This will keep all that yummy filling inside while they bake!
6. Bake:
Place your prepared hand pies on the lined baking sheet. Brush the tops with the remaining beaten egg to give them a beautiful golden color when baked. Pop them into the oven and bake for about 20-25 minutes, or until they’re golden brown and crispy.
7. Make the Glaze:
While your pies are baking, whisk together the powdered sugar, milk (or cream), and vanilla extract in a small bowl to create a simple glaze.
8. Drizzle and Serve:
Once the hand pies are out of the oven and have cooled slightly, drizzle that tasty glaze over the top. Let them cool a bit more, then serve them warm or at room temperature. Enjoy your homemade peach hand pies!
FAQ for Easy Peach Hand Pies
Can I Use Canned or Frozen Peaches Instead?
Absolutely! If using canned peaches, be sure to drain them well and adjust the sugar in the filling since they are often sweeter. For frozen peaches, thaw and drain them beforehand, then chop them up to use in the filling. This will work just as well!
How Can I Make These Hand Pies More Unique?
Feel free to get creative! Adding a pinch of nutmeg or swapping in some diced strawberries or blueberries can give the filling a fun twist. You can also sprinkle some coarse sugar on top before baking for added crunch!
What’s the Best Way to Store Leftover Hand Pies?
Store any leftovers in an airtight container at room temperature for up to 2 days. If you want to keep them longer, they can be refrigerated for up to a week. Just remember to reheat them gently in the oven for best results!
Can I Freeze These Hand Pies Before Baking?
Yes! You can assemble the hand pies and place them on a baking sheet. Freeze them for about an hour until solid, then transfer them to a freezer-safe bag or container. When you’re ready to bake, there’s no need to thaw—just add a few extra minutes to the baking time!