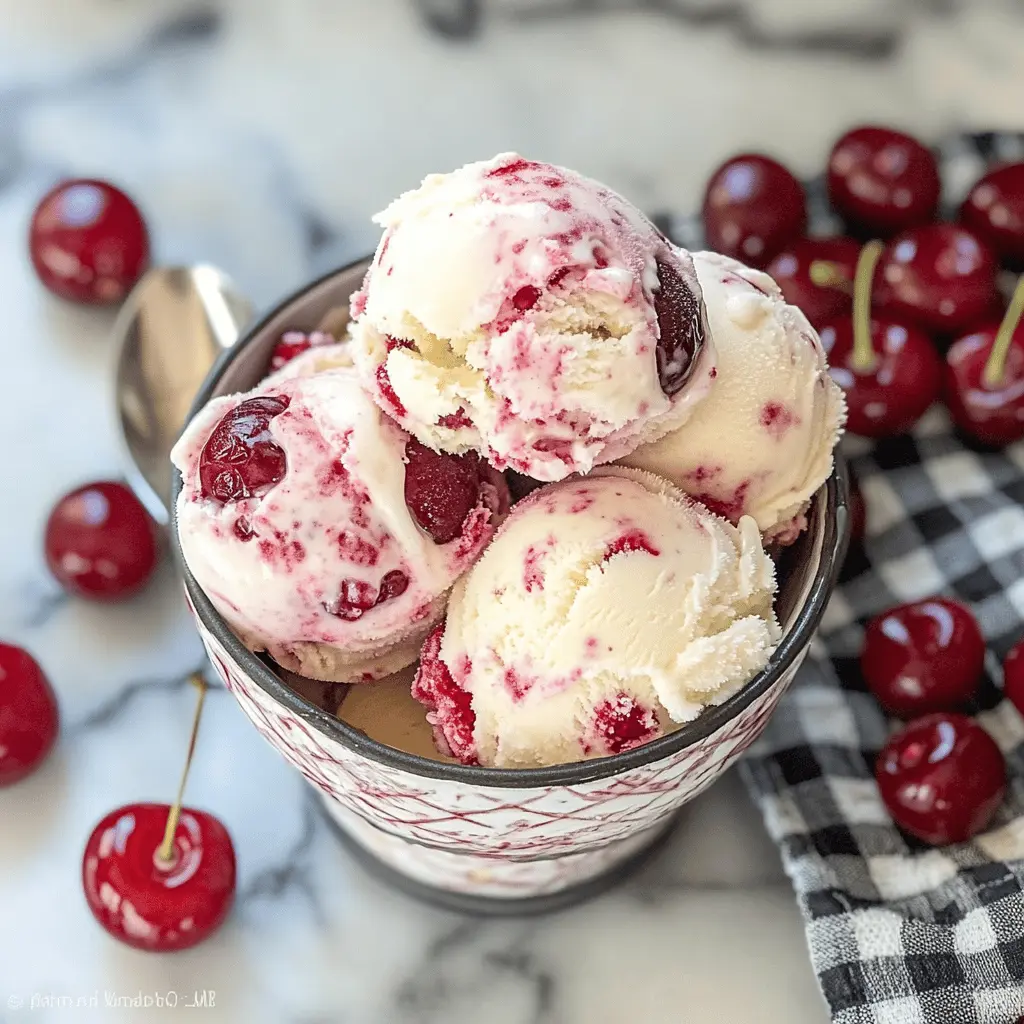
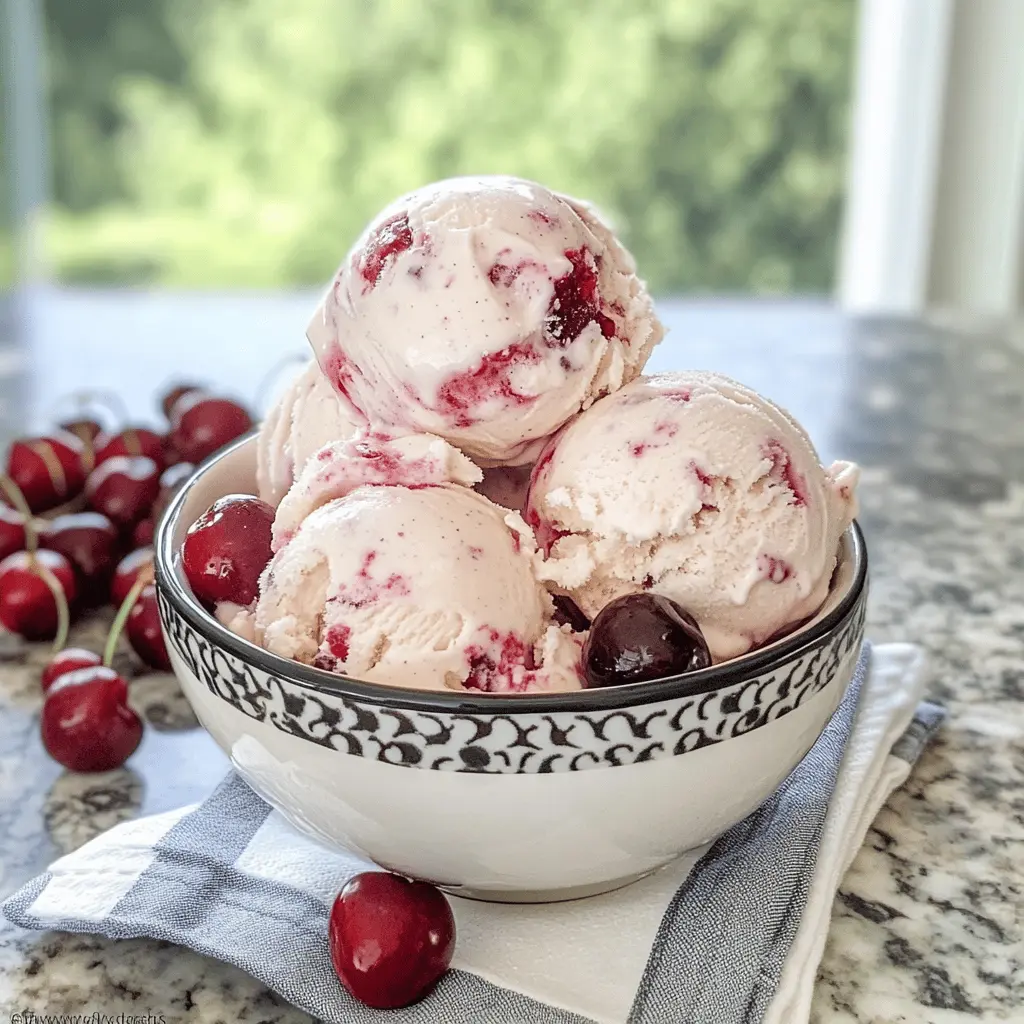
This cherry vanilla ice cream is a sweet treat that’s super easy to make. With fresh cherries and creamy vanilla, every scoop is a delicious delight for summer days!
You can’t go wrong with this combo—it’s like a cherry pie and vanilla scoop met and fell in love! I love serving it in a big bowl topped with more cherries. Yum! 🍒✨
Key Ingredients & Substitutions
Cherries: Fresh cherries are key for this recipe. If they’re out of season, you can use frozen cherries—just make sure they’re thawed and drained. I like to leave some chunks for that nice bite!
Heavy Cream: This adds richness and creaminess to the ice cream. You can substitute it with half-and-half for a lighter version, but it won’t be as creamy. I prefer using organic cream when available for the best flavor.
Whole Milk: Whole milk provides a smooth texture. You could also use lower-fat milk, but the ice cream may be icier. If lactose intolerant, try almond or oat milk, though it may slightly change the flavor.
Vanilla Extract: Pure vanilla extract is a must for that lovely vanilla flavor. If you’re in a pinch, vanilla essence can work, but expect a less intense taste. Homemade vanilla extract is also a fun option!
How Do I Make Sure My Ice Cream is Creamy and Not Icy?
The key to a creamy texture is in the chilling and churning process. Here are some steps to keep in mind:
- **Chill the base thoroughly:** Allowing the ice cream mixture to chill for at least 2 hours (or overnight) helps it get really cold before churning, reducing iciness.
- **Do not over-churn:** Keep an eye on your ice cream maker. Stop when it’s thick, resembling soft serve; over-churning can make it grainy.
- **Fold gently:** When adding cherries, fold gently to keep as much air in the mix as possible for a lighter texture.
These little tips are my secret to homemade ice cream that always turns out creamy and delicious! Enjoy your cherry vanilla treat! 🍦
Easy Homemade Cherry Vanilla Ice Cream
Ingredients You’ll Need:
For the Cherry Mixture:
- 2 cups fresh cherries, pitted and chopped
- 1/4 cup granulated sugar (for cherries)
For the Ice Cream Base:
- 2 cups heavy cream
- 1 cup whole milk
- 3/4 cup granulated sugar (for ice cream base)
- 1 tablespoon pure vanilla extract
- Pinch of salt
How Much Time Will You Need?
This delightful cherry vanilla ice cream will take about 30 minutes to prepare and mix, plus at least 6 hours for chilling and freezing. Plan to spend some time waiting as the flavors meld and the ice cream sets—totally worth it!
Step-by-Step Instructions:
1. Prepare the Cherries:
Start by placing your chopped cherries in a medium bowl, and toss them with 1/4 cup of sugar. Let them sit for about 30 minutes—this allows the cherries to release their yummy juices, making them even sweeter! If there’s too much liquid afterward, just drain some but keep it to swirl later.
2. Make the Ice Cream Base:
In a separate mixing bowl, mix together the heavy cream, whole milk, 3/4 cup sugar, vanilla extract, and a pinch of salt. Whisk everything together until the sugar is completely dissolved and the mixture is smooth. This creamy base is where all the magic happens!
3. Chill the Base:
Cover your mixture with plastic wrap or a lid, then pop it into the refrigerator. Let it chill for at least 2 hours or even overnight if you can—this sets the stage for creamy ice cream.
4. Churn the Ice Cream:
Once chilled, pour the mixture into your ice cream maker and churn according to the manufacturer’s directions. Typically, this takes about 20-25 minutes until it thickens nicely and resembles soft-serve ice cream.
5. Add Cherries and Swirl:
Now, it’s cherry time! Gently fold your macerated cherries and any reserved juice into the churned ice cream. Make sure to create beautiful swirls but be careful not to overmix—you want to keep some pretty cherry pieces!
6. Freeze to Set:
Transfer the cherry vanilla ice cream into a lidded container. Make sure it’s airtight, then freeze for at least 4 hours or until it’s nice and firm. This is the hardest part—waiting!
7. Serve and Enjoy:
Once set, scoop your delicious cherry vanilla ice cream into bowls or cones. Enjoy the creamy texture with bursts of cherry sweetness. Perfect for cooling off on a hot day!
This recipe creates a beautiful balance of creamy vanilla and vibrant cherry flavors, making it an ideal treat for any ice cream lover. Dive into your homemade cherry vanilla goodness! 🍦
FAQ: Easy Homemade Cherry Vanilla Ice Cream
Can I Use Frozen Cherries Instead of Fresh?
Yes, you can! Just ensure the frozen cherries are thawed and well-drained before using. This will help prevent excess liquid from making your ice cream icy.
How Can I Make This Dairy-Free?
If you’re looking to make this cherry vanilla ice cream dairy-free, substitute the heavy cream with coconut cream and replace whole milk with almond or oat milk. Just be mindful that the flavor and texture may vary slightly!
How Should I Store Leftover Ice Cream?
Store any leftover ice cream in an airtight container in the freezer. It will stay fresh for about 2-3 weeks. Just let it sit out for a few minutes before serving to make scooping easier!
Can I Add Other Mix-ins Like Chocolate Chips?
Absolutely! Feel free to add chocolate chips, crushed nuts, or even cookie pieces during the last few minutes of churning for extra texture and flavor. Just be sure to fold them in gently!
Feel free to ask any additional questions you may have about making and enjoying this delicious cherry vanilla ice cream! 🍒🍦